Why I Switched to a Ceiling TV Mount for My 65-Inch TV: A Game Changer in Home Entertainment
As I embarked on the journey of transforming my living space into a cozy entertainment hub, I quickly realized the importance of making smart choices about how to display my beloved television. After much contemplation, I discovered the game-changing solution of a ceiling TV mount for my 65-inch screen. Imagine the thrill of reclaiming floor space while enjoying an unobstructed view from anywhere in the room! With the rise of sleek designs and innovative mounting options, ceiling mounts have emerged as a stylish and practical way to elevate our viewing experiences. In this article, I’ll explore the ins and outs of ceiling TV mounts, sharing insights on their benefits, installation tips, and why they might just be the perfect fit for your home. Whether you’re a movie enthusiast, a sports fanatic, or simply looking to maximize your space, there’s much to uncover about this modern mounting solution that can revolutionize the way you enjoy your favorite shows and movies.
I Personally Tried The Ceiling TV Mount For 65 Inches And Here Are My Honest Recommendations

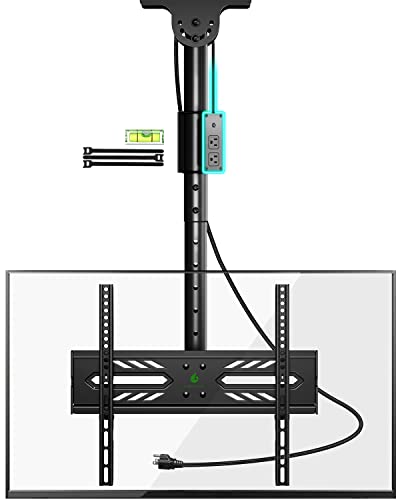
PERLESMITH Ceiling TV Mount for 26-65 inch Flat Screen Displays, Hanging Adjustable Ceiling TV Bracket Fits Most LCD LED OLED 4K TVs, Pole Ceiling Mount Holds up to 110lbs, Max VESA 400x400mm, PSCM2

Perlegear Ceiling TV Mount, Hanging TV Mount for 37-75 inch Flat or Curved TVs up to 99 lbs, Full Motion TV Bracket with Swivel, Tilt, Max VESA 600x400mm, PGLCM1

WALI TV Ceiling Mount Adjustable Bracket Fits Most LED, LCD, OLED and Plasma Flat Screen Display 26 to 65 Inch, up to 110 Lbs, Mounting Holes 400x400mm (CM2665), Black
Greenstell Ceiling TV Mount with Power Outlet, TV Mount for 26-65 inch TVs, Ceiling Mount with 900J Surge Protection, Swivel, Tilt and 6 Height Adjustable, Max VESA 400x400mm, Holds up to 110Lbs
1. PERLESMITH Ceiling TV Mount for 26-65 inch Flat Screen Displays, Hanging Adjustable Ceiling TV Bracket Fits Most LCD LED OLED 4K TVs, Pole Ceiling Mount Holds up to 110lbs, Max VESA 400x400mm, PSCM2
As I explored the PERLESMITH Ceiling TV Mount for 26-65 inch Flat Screen Displays, I was genuinely impressed by what it brings to the table. This ceiling mount is not just another accessory; it’s a game-changer for anyone looking to optimize their living space or enhance their viewing experience. With the ability to accommodate a wide range of TV sizes, from 26 to 65 inches, it’s versatile enough to fit most LCD, LED, and OLED models, making it an ideal choice for various setups. The mount’s design is sleek and unobtrusive, allowing my TV to become a focal point without overwhelming the room’s aesthetics.
One of the standout features that caught my attention is its impressive weight capacity. With a robust hold of up to 110 lbs, I felt confident that my television was secure and stable. This is particularly important to me, as I have friends and family over often, and the last thing I want to worry about is whether the mount can support my TV. Moreover, the maximum VESA compatibility of 400x400mm means that it caters to a broad spectrum of televisions, ensuring that I won’t run into compatibility issues when upgrading my screen in the future.
The adjustable hanging feature is another highlight that I found particularly useful. It allows for a customizable viewing angle, which is essential for achieving the perfect setup in any room. Whether I’m watching a movie, playing video games, or enjoying a sports event, having the ability to tilt or swivel the TV to my preferred angle enhances my viewing experience significantly. This flexibility means that I can also install the TV in various locations, such as a living room, bedroom, or even a commercial space, making it an excellent investment.
Installation is always a concern when it comes to mounting hardware, but I found the PERLESMITH Ceiling TV Mount to be user-friendly. The package includes all the necessary hardware and a detailed instruction manual, making the setup process straightforward. I appreciated that I could mount my TV without needing to call in a professional, saving me time and money. The durable materials used in the construction of this bracket also give me peace of mind regarding its longevity and performance.
For anyone considering a ceiling mount, I believe the PERLESMITH model stands out in terms of quality, functionality, and ease of use. It not only elevates my television but also opens up the floor space in my living room, allowing for better furniture arrangements. If you’re looking for a reliable and stylish way to mount your TV, I recommend giving this product serious consideration. It may very well be the upgrade your space needs!
Feature Description Compatibility Accommodates 26-65 inch flat screen displays Weight Capacity Supports up to 110 lbs VESA Compatibility Max VESA 400x400mm Adjustability Hanging adjustable feature for custom viewing angles Installation Includes all necessary hardware and instructions
Get It From Amazon Now: Check Price on Amazon & FREE Returns
2. Perlegear Ceiling TV Mount, Hanging TV Mount for 37-75 inch Flat or Curved TVs up to 99 lbs, Full Motion TV Bracket with Swivel, Tilt, Max VESA 600x400mm, PGLCM1
As someone who appreciates the aesthetic and functional aspects of home entertainment, I am genuinely excited about the Perlegear Ceiling TV Mount. This product is particularly appealing to me because it offers a versatile solution for mounting TVs ranging from 37 to 75 inches, accommodating both flat and curved displays with a substantial weight capacity of up to 99 lbs. The ability to mount my television on the ceiling not only saves space but also creates a unique viewing experience that can transform any room into a cozy cinema environment.
The features of this mount are incredibly impressive. With full motion capabilities, I can easily swivel and tilt my TV to achieve the perfect viewing angle, whether I’m lounging on the couch or hosting a movie night with friends. The maximum VESA compatibility of 600x400mm ensures that it fits a wide variety of TV brands and models, allowing me to choose the best screen without worrying about whether it will fit the mount. This flexibility makes it an excellent choice for anyone looking to upgrade their home entertainment setup.
One of the standout aspects of the Perlegear Ceiling TV Mount is its strong yet lightweight design. It’s reassuring to know that it can securely hold my TV without compromising safety. The installation process is user-friendly, which is a significant advantage for someone like me who prefers to tackle DIY projects. Additionally, the mount’s sleek finish will complement my decor, enhancing the overall ambiance of my living space.
Having a ceiling-mounted TV also opens up a world of possibilities for creative interior design. I can now enjoy watching my favorite shows or movies in unconventional spaces like my garage or outdoor patio, providing a perfect solution for gatherings or quiet evenings. This mount not only serves a practical purpose but also adds a touch of modern elegance to my home.
if you’re contemplating an upgrade to your home entertainment setup, I wholeheartedly recommend considering the Perlegear Ceiling TV Mount. Its functionality, design, and ease of installation make it an excellent investment for anyone who values both aesthetics and practicality. Don’t miss out on the opportunity to elevate your viewing experience—this could be the perfect addition to your home.
Feature Description Compatibility Fits 37-75 inch flat or curved TVs Weight Capacity Supports TVs up to 99 lbs Motion Features Full motion with swivel and tilt options Max VESA Compatible with VESA sizes up to 600x400mm Installation User-friendly installation process Design Sleek finish that complements home decor
Get It From Amazon Now: Check Price on Amazon & FREE Returns
3. WALI TV Ceiling Mount Adjustable Bracket Fits Most LED, LCD, OLED and Plasma Flat Screen Display 26 to 65 Inch, up to 110 Lbs, Mounting Holes 400x400mm (CM2665), Black
When it comes to enhancing my viewing experience, the WALI TV Ceiling Mount Adjustable Bracket has truly caught my attention. This product stands out not just for its robust design but also for its remarkable versatility. It’s designed to accommodate a wide range of television sizes, specifically those between 26 to 65 inches and weighing up to 110 lbs. This universal compatibility is a huge plus for anyone who may own different types of TVs over time. I appreciate that it supports multiple mounting hole patterns, including 400×400 mm, 300×300 mm, and even smaller configurations. This means I can confidently install it regardless of the TV model I own, making it a future-proof investment.
One of the key features that I find particularly appealing is the heavy-duty steel construction of this ceiling mount. Knowing that my TV will be securely held in place provides me with peace of mind. Installation seems straightforward, which is a relief since the last thing I want is to struggle with complex setups. The versatility of being able to mount it on flat ceilings, sloped ceilings, or even against the side of a joist opens up a world of possibilities for placement in my home or business. Whether I’m looking to mount a TV in my living room, a bar, or even a fitness center, this bracket can adapt to my needs.
Another feature that stands out is the adjustable viewing angles. The ability to tilt the TV down by 25 degrees and swivel it 360 degrees means I can optimize my viewing experience based on my seating arrangement. The incremental height adjustment, ranging from 18.5 to 35.8 inches from the ceiling to the center of the mounting plate, allows me to find the perfect height for viewing. This flexibility is essential, especially in spaces with high ceilings where standard mounts might not suffice.
The design is not only functional but also aesthetically pleasing. It’s an ideal solution for various environments, whether it’s for a home theater, a restaurant with sports screens, or even a medical office where patients may need a distraction while waiting. The WALI mount enhances the ambiance and utility of any space, making it a valuable addition to my setup.
The package includes everything I need the TV ceiling mount itself, a mounting hardware kit, and a user manual that simplifies the installation process. Plus, having access to experienced customer support available seven days a week is a significant advantage. It reassures me that should I encounter any issues, help is readily available.
In summary, the WALI TV Ceiling Mount Adjustable Bracket is an investment that I believe will enhance my viewing experience significantly. Its universal compatibility, heavy-duty design, and adjustable features make it suitable for a range of settings. If you’re considering a reliable ceiling mount for your TV, I wholeheartedly recommend the WALI bracket. It’s a purchase that I think will pay off in both functionality and peace of mind.
Feature Description Universal Compatibility Fits most displays up to 65 inches and 110 lbs with multiple mounting hole patterns. Heavy Duty Solid steel construction ensures secure hold and easy installation on various ceiling types. Adjustment Tilt down 25°, swivel 360°, and 2-inch incremental height adjustment for optimal viewing. Ideal Design Suitable for high-ceiling homes, bars, restaurants, fitness centers, and medical offices. Package Includes TV Ceiling Mount, Mounting Hardware Kit, User Manual, and US-based customer support.
Get It From Amazon Now: Check Price on Amazon & FREE Returns
4. Greenstell Ceiling TV Mount with Power Outlet, TV Mount for 26-65 inch TVs, Ceiling Mount with 900J Surge Protection, Swivel, Tilt and 6 Height Adjustable, Max VESA 400x400mm, Holds up to 110Lbs
When I first came across the Greenstell Ceiling TV Mount with Power Outlet, I was immediately impressed by the thoughtful design and the array of features it offers. This product caters specifically to those who desire both functionality and style in their living or entertainment spaces. With the ability to accommodate TVs ranging from 26 to 65 inches and hold up to 110 lbs, it promises versatility for a wide range of users. Whether you own a sleek Samsung or a classic LG, this mount is compatible with a multitude of brands, ensuring that it can fit seamlessly into your existing setup.
One of the standout features of this ceiling mount is its user-friendly design, particularly the inclusion of two AC outlets and a generous 13.1ft power cord. This is a game-changer for anyone who has struggled with cable management in the past. The integrated 900J surge protection is an additional layer of security that provides peace of mind, safeguarding your valuable electronics from unexpected power surges. It not only protects your devices but also extends their service life, making it a smart investment for the long run.
The full motion capability of the Greenstell ceiling mount is another aspect I find incredibly appealing. With the ability to tilt your TV screen up +5° and down -15°, as well as swivel it 360°, I can easily adjust the viewing angle to reduce glare or accommodate different seating arrangements. The six adjustable height settings ranging from 19.5″ to 29.5″ mean that I can customize the position of my TV to achieve optimal viewing comfort, whether I’m hosting a movie night or catching the latest game with friends.
Installation is often a concern with ceiling mounts, but Greenstell has made this process remarkably straightforward. With clear instructions, pre-labeled hardware bags, a bubble level for precision, and even cable ties for organization, I felt confident tackling the setup myself. The built-in cable management system is a thoughtful touch that conceals wires within the mount pole, keeping my space neat and uncluttered. This is especially beneficial in environments like restaurants or gyms where a clean aesthetic is crucial.
Moreover, the space-saving design of this mount is a significant advantage, particularly for those living in smaller homes or apartments where wall mounting is not feasible. It can be installed on both flat and sloped ceilings, making it an adaptable option for various settings, from bedrooms to commercial spaces. I can easily envision it enhancing the ambiance in a cozy home theater or serving as a sleek addition in a bustling bar or restaurant.
All things considered, the Greenstell Ceiling TV Mount with Power Outlet is an exceptional choice for anyone looking to elevate their viewing experience. Its combination of safety features, compatibility, and ease of installation makes it stand out in a crowded market. If you’re ready to take your TV setup to the next level, I highly recommend considering this ceiling mount. It’s not just about mounting your TV; it’s about creating a space where you can enjoy your favorite shows and movies in comfort and style. Don’t miss out on this opportunity to enhance your entertainment experience!
Feature Details TV Size Compatibility 26-65 inches Weight Capacity Up to 110 lbs Power Outlets 2 AC outlets Surge Protection 900J Height Adjustment 6 settings (19.5″ to 29.5″) Swivel and Tilt 360° swivel, +5° to -15° tilt Installation Includes instructions, pre-labeled hardware, bubble level Cable Management Built-in system for wire concealment
Get It From Amazon Now: Check Price on Amazon & FREE Returns
Why a Ceiling TV Mount for My 65-Inch TV Changed My Viewing Experience
When I decided to upgrade to a 65-inch TV, I quickly realized that finding the right placement was crucial for the best viewing experience. That’s when I discovered the benefits of a ceiling TV mount. By mounting my TV from the ceiling, I was able to optimize the space in my living room, avoiding the clutter of bulky furniture that often comes with traditional TV stands.
Not only did the ceiling mount free up valuable floor space, but it also allowed for a more versatile viewing angle. I could adjust the TV to face different areas of the room, making it perfect for movie nights or gatherings with friends. I loved being able to tilt and swivel the screen to ensure everyone had the best seat in the house, no matter where they were sitting.
Additionally, I found that a ceiling mount helped reduce glare from windows and lights, enhancing my viewing experience. I could enjoy my favorite shows and movies without the annoying distractions that come with reflections on the screen. Overall, investing in a ceiling TV mount for my 65-inch TV has truly transformed how I enjoy entertainment in my home, and I can’t imagine going back to a traditional setup.
Buying Guide for Ceiling TV Mount 65 Inch
Understanding My Needs
Before I even start looking for a ceiling TV mount for my 65-inch television, I take a moment to consider my specific needs. I think about the space I have available, the viewing angles I desire, and how often I plan to adjust the TV. Knowing whether I want a fixed mount or one that tilts or swivels helps narrow down my options.
Weight Capacity
One of the first things I check is the weight capacity of the mount. My 65-inch TV is hefty, and I want to ensure that the mount can support it securely. I always look for mounts that can hold at least 20% more than my TV’s weight for added safety.
Ceiling Height and Type
I also consider the height of my ceiling. A higher ceiling may require an extended mount, while a lower ceiling could mean a standard mount will suffice. Additionally, I take into account the type of ceiling I have—whether it’s flat, sloped, or vaulted—as this influences the type of mount I should choose.
Installation Process
As I think about installation, I prefer a mount that comes with clear instructions and all the necessary hardware. I appreciate mounts that offer a straightforward installation process, as I often prefer to do it myself. I also consider whether I need any special tools for installation.
Adjustability Features
Adjustability is another significant factor for me. I enjoy having the option to tilt or swivel my TV to achieve the best viewing angle. I check if the mount allows for easy adjustments after installation, which is especially important if I plan to rearrange my space frequently.
Material and Durability
I pay close attention to the materials used in the mount’s construction. Sturdy materials such as steel provide the durability I’m looking for, while also ensuring safety. I like to read reviews or specifications to gauge the longevity of the mount.
Wire Management
I find that a clean setup contributes to my overall enjoyment of the TV experience. Therefore, I look for mounts that offer wire management solutions. Keeping cables organized and out of sight is essential for me, as it creates a more polished and tidy appearance.
Price Considerations
Setting a budget is critical in my buying journey. I want to find a ceiling TV mount that offers the features I need without breaking the bank. I compare various options within my budget to ensure I’m getting the best value for my investment.
Customer Reviews
Finally, I always check customer reviews before making a purchase. Hearing about other people’s experiences helps me gauge the mount’s performance and reliability. I look for feedback on installation ease, durability, and overall satisfaction.
By considering these factors, I feel confident in selecting the right ceiling TV mount for my 65-inch television. I take my time to make an informed decision that enhances my viewing experience.
Author Profile

-
I’m Jonas Powell, and my journey has been anything but conventional. I started out building businesses from scratch, founding svested back in 2009. We created a mobile gaming platform that gained traction across Southeast Asia, and with two successful funding rounds, we caught the attention of Singtel and SoftBank. That acquisition in 2012 was my first big milestone. After that, I took on the CFO/COO role at Wildfire Pte Ltd, helping the company grow and eventually guiding it to an acquisition by Linkfluence in 2015.
But in 2025, I felt the urge to shift again. Not away from startups, but toward something more personal. I began writing. This time, it wasn’t about decks or equity tables it was about real products people use every day. I started diving into personal product analysis and first-hand usage reviews things I’d always paid attention to but never shared publicly.
Latest entries
- November 25, 2025Personal RecommendationsWhy I Recommend the 0.5 Oz Bottle Size: My Expert Take on Its Perfect Portability and Convenience
- November 25, 2025Personal RecommendationsUnlocking the Secrets of 0-60-60 Fertilizer: My Personal Journey to Thriving Plants
- November 25, 2025Personal RecommendationsWhy I Trust 0.9% Sodium Chloride Irrigation: A Personal Experience and Expert Insights
- November 25, 2025Personal RecommendationsWhy I Recommend the 0 Gauge Amp Kit OFC for Ultimate Car Audio Performance: An Expert’s Experience