Transforming My Driveway: The Ultimate Guide to Choosing the Perfect Basketball Lines
As a basketball enthusiast, there’s nothing quite like the thrill of shooting hoops right in my own driveway. The sound of the ball bouncing against the pavement, the swoosh of the net, and the freedom to play whenever I want—there’s a unique joy in that experience. However, I quickly realized that having the right basketball lines for my driveway could elevate my game and create a more authentic court vibe. Whether it’s marking the three-point line for those long-range shots or the free-throw line for perfecting my technique, the right layout not only enhances the aesthetics of my space but also fosters a more competitive and enjoyable atmosphere. In this article, I’ll share insights on how to create the perfect basketball lines for your driveway, ensuring every game feels like a pro experience right at home.
I Personally Evaluated The Basketball Lines For My Driveway And Share My Genuine Recommendations Below

Murray Sporting Goods Basketball Court Marking Stencil Kit for Driveway, Asphalt or Concrete | Court Marking Stencil Spray Paint Kit for Backyard Basketball Court (2.0)

STENCILIT Basketball Court Stencil Kit for Concrete – Thick Plastic, Professional Kit for Driveway & Concrete, Reusable, Easy Assembly, Key & 3Point Lines Basketball Stencil, High-School Regulation

Basketball Court Marking Kit Basketball Court Stencil Kit for Concrete Driveway to Paint Basketball Court Lines Half Court High School Regulation Size 39.6′ x 21′
1. Murray Sporting Goods Basketball Court Marking Stencil Kit for Driveway, Asphalt or Concrete | Court Marking Stencil Spray Paint Kit for Backyard Basketball Court (2.0)
As a basketball enthusiast, I am always on the lookout for tools that can elevate my game and transform any space into a suitable court. The ‘Murray Sporting Goods Basketball Court Marking Stencil Kit’ has truly caught my attention. This stencil kit is designed specifically for creating professional-quality basketball court markings on driveways, asphalt, or concrete surfaces, making it an excellent choice for anyone serious about their game, whether at home or in public spaces.
One of the standout features of this kit is its quick and easy setup. I appreciate that I can transform my driveway or backyard into a basketball court in just about 30-35 minutes. The instructions are straightforward laying out the cardboard stencil kit takes about 15-20 minutes, followed by another 10-15 minutes of painting. After a drying period of just 30 minutes, I am ready to hit the court and show off my skills. This kind of efficiency is perfect for individuals who want to spend more time playing rather than preparing.
The fact that this kit is proudly made in the USA adds to its appeal for me. It offers regulation-quality markings, including a 12-foot wide free throw lane, a 15-foot free throw line, and a 19’ 9” high school regulation 3-point line. This level of authenticity and accuracy is crucial for anyone looking to practice serious basketball skills. Moreover, the reusable nature of the kit makes it a wise investment. I can set up a full court multiple times without worrying about wear and tear, ensuring long-term enjoyment and practice.
Innovation shines through with the unique design of this stencil kit. The “puzzle-like” connector pieces (patent pending) ensure that I can set up the kit without any hassle. The self-aligning design means that every piece fits perfectly, preventing any misalignment during spraying. This feature is a game-changer as it eliminates the common problem of stencil movement, which can ruin the integrity of the court markings. The 6-inch wide cardboard pieces and spray guard work together to minimize overspray, ensuring that I achieve crisp and clean lines every time. For someone like me who values precision, this is a significant advantage.
Additionally, the kit includes essential tools that enhance the entire setup experience. The back-of-the-rim alignment tool and plumb bob are fantastic for ensuring perfect placement of the markings. The “Get it right” mentality embedded in this kit resonates with me because it emphasizes the importance of accuracy in gameplay. With these professional-grade markings, I feel confident and ready to dominate the court, knowing that my setup is on point.
the ‘Murray Sporting Goods Basketball Court Marking Stencil Kit’ is more than just a product; it’s a gateway to enhancing my basketball experience. With its combination of ease of use, high-quality materials, innovative design, and professional-grade accuracy, I can wholeheartedly recommend this kit to anyone looking to create a basketball court at home or elsewhere. It’s an investment that pays off in skill development and pure enjoyment of the game. If you’re serious about basketball, this kit is definitely worth considering!
Feature Description Quick and Easy Setup Transform any space into a basketball court in about 30-35 minutes. Proudly Made in the USA Regulation-quality markings with reusable components for long-term use. Innovative Stencil Design Self-aligning pieces prevent movement and ensure precision during setup. Included Tools Plumb bob and alignment tools for perfect placement of markings. Paint Not Included Easy to use with any spray paint of choice for customized colors.
Get It From Amazon Now: Check Price on Amazon & FREE Returns
2. Spalding Basketball Court Marking Kit
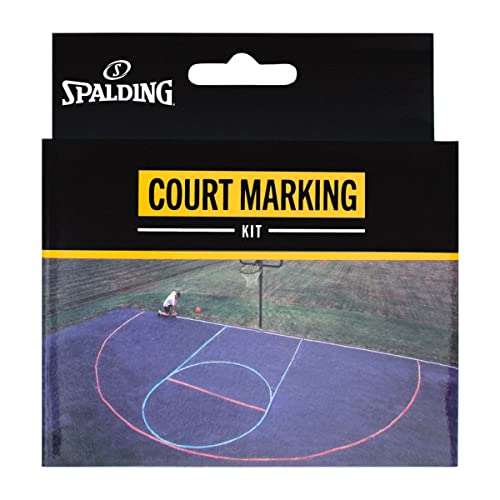
As an avid basketball enthusiast, I was thrilled to come across the Spalding Basketball Court Marking Kit. This product not only speaks to my love for the game but also presents a practical solution for anyone looking to set up a basketball court in their backyard or local outdoor space. The convenience and ease of use that this kit offers are truly remarkable, making it an essential tool for players of all ages and skill levels.
One of the standout features of the Spalding Basketball Court Marking Kit is its inclusion of three pieces of chalk in vibrant colors red, white, and blue. These colors allow me to easily create essential markings on the court, such as the lane, free throw line, and three-point arc. This is particularly beneficial for players who want to practice their shots and improve their game. The clear delineation of these areas not only enhances the authenticity of my court but also helps players understand the rules and strategies of basketball better.
The kit also comes with a cord equipped with four colored rings, which I found to be a clever addition. This feature aids in accurately marking the dimensions of the court without needing to rely solely on estimation. As someone who appreciates precision, I can confidently say that this tool allows me to create a court that meets official standards, which is ideal for hosting friendly games with friends and family. It’s also a fantastic way to encourage youngsters to get involved in the sport, as they can clearly see where to position themselves during gameplay.
Another advantage that I find particularly appealing is that the markings wash off with water. This means I can easily remove and reapply the lines as needed, whether I’m changing the layout for different games or simply want to refresh the look of my court. This flexibility is perfect for someone like me who values variety and creativity in gameplay. I no longer have to worry about permanent markings ruining my yard; instead, I can enjoy my space while still having a functional basketball court.
Designed specifically for outdoor residential play, this kit is perfect for anyone who wants to engage in basketball without the need for a professional setup. Whether I’m playing a casual game with friends, practicing drills, or teaching my kids the fundamentals, this kit ensures that we have a properly marked court that enhances our experience. It’s a great way to promote physical activity and social interaction in a safe and fun environment.
I genuinely believe that the Spalding Basketball Court Marking Kit is an excellent investment for any basketball lover. Its user-friendly features, vibrant colors, and easy cleanup options make it a must-have for anyone looking to elevate their outdoor play. So if you’re considering enhancing your own basketball experience, I would highly recommend taking the plunge and grabbing this kit. Trust me, you won’t regret it!
Feature Description Chalk Colors Includes red, white, and blue chalk for clear court markings. Cord with Colored Rings Helps to accurately mark dimensions of the court. Washable Marks can be easily removed with water for flexibility. Outdoor Use Designed for residential outdoor play, suitable for all ages.
Get It From Amazon Now: Check Price on Amazon & FREE Returns
3. STENCILIT Basketball Court Stencil Kit for Concrete – Thick Plastic, Professional Kit for Driveway & Concrete, Reusable, Easy Assembly, Key & 3Point Lines Basketball Stencil, High-School Regulation
When I first came across the STENCILIT Basketball Court Stencil Kit, I knew immediately that this product was designed for anyone passionate about basketball, whether you’re a coach, a player, or a parent wanting to create a fun and engaging environment for kids. This stencil kit stands out not just for its impressive features, but for the value it offers in transforming any concrete surface into a professional-grade basketball court. If you’re looking to elevate your game or create a dedicated playing space, this kit is definitely worth considering.
One of the standout features of the STENCILIT kit is its durability. Made from 1mm thick PPE plastic, this stencil is built to last. I appreciate that it’s weatherproof and reusable, making it an ideal choice for anyone who wants to mark their court for years to come. Whether you’re in a region with harsh weather conditions or just want a reliable solution for multiple court setups, this stencil kit has you covered. The ability to use it court after court means I can keep my playing area looking fresh without worrying about wear and tear.
The ease of assembly is another feature that really caught my eye. With the capability to lay down a full basketball court in under an hour, I can see how this would be a game changer for busy individuals or teams. The rapid, color-coded 3-part stencil design simplifies the process of marking a court. No more complicated setups or wasted time – just unfold, align, and paint. For someone who values efficiency, I find this extremely appealing. It’s perfect for schools or community parks where time is often of the essence.
Moreover, achieving professional-level precision is something that I think many users will appreciate. The STENCILIT kit allows for crisp, accurate markings that meet high-school regulation standards. This means that whether you’re setting up for a school tournament, a community event, or just a casual game with friends, you can count on having a court that looks and feels like the real deal. This level of quality is something I find very attractive, especially when it comes to fostering a serious basketball culture in any environment.
The complete kit includes everything I need for a perfect court a premium stencil, clear instructions (both written and video), and even a box that doubles as a spray guard for clean lines. I love that STENCILIT has thought of everything to ensure I have a smooth experience from start to finish. This comprehensive approach not only saves me time but also helps me avoid any potential mistakes that might arise during the court marking process.
Lastly, I appreciate that STENCILIT has been trusted by professionals since 2013. This speaks volumes about the quality and reliability of their products. Knowing that other users, especially professionals, have successfully used this kit gives me the confidence to invest in it. If you’re passionate about basketball and want to create a high-quality playing surface, I would recommend giving the STENCILIT Basketball Court Stencil Kit a try. It’s an investment that promises to enhance your basketball experience significantly.
Feature Description Durability 1mm thick PPE plastic, weatherproof, reusable for multiple setups. Easy Assembly Complete court setup in under an hour with a color-coded 3-part design. Professional Precision Crisp and accurate markings that meet high-school regulation standards. Complete Kit Includes stencil, clear instructions, and spray guard box for clean lines. Trusted Brand Established since 2013, known for high-quality stencil products.
Get It From Amazon Now: Check Price on Amazon & FREE Returns
4. Basketball Court Marking Kit Basketball Court Stencil Kit for Concrete Driveway to Paint Basketball Court Lines Half Court High School Regulation Size 39.6′ x 21′
As a passionate basketball enthusiast, I am always on the lookout for ways to enhance my playing experience, whether on the court or in my driveway. The Basketball Court Marking Kit has caught my attention for its impressive features and practical design. This kit is not just any ordinary stencil kit; it is meticulously crafted to meet high school regulation sizes, ensuring that I can create a professional-grade basketball court right at home.
The dimensions of the kit are particularly noteworthy, measuring 39.6 feet wide and 21 feet long, which perfectly aligns with half-court setups. This is a significant advantage, as it includes critical markings such as the three-point line, free throw line, and key line. For someone like me, who values authenticity in the game, having these accurate markings is essential to replicate the feel of a real basketball court. It allows me to practice my shots, work on my footwork, and enjoy friendly games with friends and family, all while ensuring I am following the regulations.
One of the standout features of this kit is its quick and easy setup. I can set it up in under five minutes, which is a game-changer for someone like me who doesn’t want to waste time on complicated processes. Unlike other stencil kits that come in puzzle designs, this kit boasts a continuously connected stencil, making it incredibly user-friendly. This means I can focus more on playing rather than struggling with assembly. The speed and simplicity of the setup really allow me to dive right into the fun of playing basketball.
Durability is another key aspect that I appreciate about this kit. Made from high-density cardboard, the stencil is designed to withstand repeated use without getting soggy. This feature means that I can enjoy painting my court multiple times without worrying about wear and tear. However, it’s important to note that I need to dry the stencil completely before storing it for reuse, which is a simple step that ensures its longevity. Knowing that I can use it season after season gives me great confidence in my investment.
The kit also comes with essential accessories that enhance its value. It includes a plumb bob for aligning the stencil with the court’s center, and masking tape worth $30 in total. These additions ensure that I get the most accurate and professional results when marking my court. Having the right tools at my disposal allows me to achieve a level of precision that I wouldn’t be able to attain otherwise.
Lastly, the inclusion of a spray guard is a thoughtful touch. This feature holds the stencil in place while painting and prevents overspray, which is a common issue when using stencils. This practical addition ensures that I can create clean, sharp lines without the mess. It enhances the overall experience of painting my basketball court, making it an enjoyable task rather than a chore.
the Basketball Court Marking Kit is a fantastic investment for anyone who is serious about basketball, whether for practice, fun, or even competitive play. Its high school regulation sizing, ease of setup, durability, valuable accessories, and thoughtful design elements make it an essential kit for basketball lovers like me. I genuinely believe that this product can elevate your game and provide you with hours of enjoyment. If you’re looking to create your own basketball court at home, I highly recommend considering this kit—it’s a decision you won’t regret!
Feature Details Size 39.6 feet wide x 21 feet long (Half Court) Markings Included 3-point line, Free throw line, Key line Setup Time Under 5 minutes Material High-density cardboard Accessories Plumb bob, Masking tape (worth $30) Special Feature Spray guard to prevent overspray
Get It From Amazon Now: Check Price on Amazon & FREE Returns
Why Basketball Lines for My Driveway Helped Me Improve
When I decided to paint basketball lines on my driveway, I had no idea how much it would enhance my practice sessions. Having clear boundaries and markings transformed my shooting drills and dribbling exercises into a more structured and focused experience. With the three-point line and free-throw line clearly defined, I could simulate game conditions, which greatly improved my shooting accuracy and overall confidence on the court.
Another significant benefit I noticed was the ability to track my progress more effectively. With the lines in place, I could set specific goals for myself—like hitting a certain number of shots from the free-throw line or perfecting my footwork within the key. This structured approach not only made my practice sessions more enjoyable but also motivated me to push my limits and see real improvements in my skills.
Finally, having basketball lines in my driveway turned my space into a mini-court that I could share with friends and family. It became a gathering spot for friendly games and practice sessions, fostering a sense of community and camaraderie. Playing with others helped me refine my teamwork and communication skills, making the experience even more rewarding. Overall, painting basketball lines on my driveway was one of the best decisions I made
Buying Guide for Basketball Lines for Driveway
Understanding My Needs
When I decided to add basketball lines to my driveway, I first took a moment to reflect on my specific needs. I considered how often I would be playing, whether I wanted a full court, half court, or just a shooting area. Understanding my usage helped me narrow down my options.
Choosing the Right Material
The material of the basketball lines is crucial for durability. I explored options like paint, tape, and decals. Each material has its pros and cons. For instance, paint offers a more permanent solution but may require touch-ups over time. Tape is easier to apply and remove, while decals can provide a clean look but might not withstand heavy play.
Measuring My Space
Next, I measured my driveway to ensure I had enough space for the lines. I considered the dimensions of a standard basketball court and adjusted my plans based on my available area. This step was essential to avoid any surprises during installation.
Deciding on Line Thickness and Color
I also thought about the thickness and color of the lines. Thicker lines are more visible and can endure more wear, while thinner lines may look sleeker. I opted for a color that stood out against my driveway surface but also complemented the overall aesthetic of my home.
Checking Local Regulations
Before moving forward, I checked local regulations or homeowners’ association rules. I wanted to ensure that my new basketball lines wouldn’t violate any guidelines. This research saved me from potential issues down the road.
Installation Process
The installation process was something I wanted to get right. I researched various methods and prepared for the task. Whether I chose to do it myself or hire a professional, I made sure I had all necessary tools and materials ready.
Maintenance Considerations
I knew that maintaining the lines would be important for their longevity. I planned a regular maintenance schedule to check for wear and tear. This included cleaning the lines and making any necessary repairs to keep them looking fresh.
Budgeting for My Project
Lastly, I set a budget for my basketball lines project. I considered all costs, including materials, tools, and any potential labor. This helped me stay within my financial limits while still achieving my desired outcome.
By following these guidelines based on my experience, I felt confident in my ability to create a great basketball area right in my driveway.
Author Profile

-
I’m Jonas Powell, and my journey has been anything but conventional. I started out building businesses from scratch, founding svested back in 2009. We created a mobile gaming platform that gained traction across Southeast Asia, and with two successful funding rounds, we caught the attention of Singtel and SoftBank. That acquisition in 2012 was my first big milestone. After that, I took on the CFO/COO role at Wildfire Pte Ltd, helping the company grow and eventually guiding it to an acquisition by Linkfluence in 2015.
But in 2025, I felt the urge to shift again. Not away from startups, but toward something more personal. I began writing. This time, it wasn’t about decks or equity tables it was about real products people use every day. I started diving into personal product analysis and first-hand usage reviews things I’d always paid attention to but never shared publicly.
Latest entries
- November 25, 2025Personal RecommendationsWhy I Recommend the 0.5 Oz Bottle Size: My Expert Take on Its Perfect Portability and Convenience
- November 25, 2025Personal RecommendationsUnlocking the Secrets of 0-60-60 Fertilizer: My Personal Journey to Thriving Plants
- November 25, 2025Personal RecommendationsWhy I Trust 0.9% Sodium Chloride Irrigation: A Personal Experience and Expert Insights
- November 25, 2025Personal RecommendationsWhy I Recommend the 0 Gauge Amp Kit OFC for Ultimate Car Audio Performance: An Expert’s Experience